
10 hacks for illustrating and drawing in Figma
Pen vs Pencil
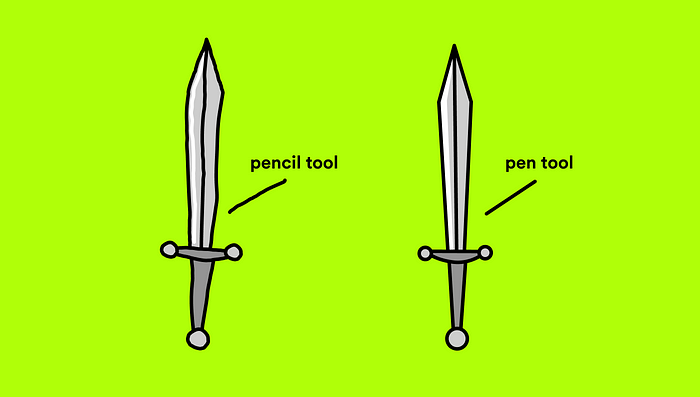
To start off any illustration it’s important to note which style works best for the piece. Using the pencil tool gives a more “hand-made” feeling while the pen tool allows for smoother edges and more polish.
- SHIFT + P: Pencil tool
- P: Pen tool
Create a Union
When we’re drawing many paths and want to then bring them together we can use CMD + E (Windows: CTRL + E). This allows us to draw in multiple strokes and then join those lines together into one shape.
Join paths

Once those paths are flattened into one shape we can join the points using CMD + J (Windows: CTRL + J).
You can also try CMD + SHIFT + J (Windows: CTRL + J) to use the smooth join tool.
You can also simply press P to pull out your pen tool and then connect the paths that way.
Editing anchor points
When you have a path created and you’d like to edit its anchor points, simply press Return (Windows: Enter) to drill in and view the anchor points.
Edit anchors using the bend tool
- Once you’ve drawn out your path you can make edits independently to anchor points and their curves by holding CMD (Windows: CTRL).
- To edit a single curve, hold Option (ALT) while pulling a handle.
- To remove the curves from a point, hold CMD (CTRL) and click the anchor point.
Get rid of anchor points you don’t need
To remove anchor points we don’t want, open the pen tool using P then hold Option (ALT) and click unwanted anchor points to remove them.
Swap fill and stroke
Use Shift + X at any point to swap the fill and stroke colors on an illustration. Keep pressing to toggle between.
Remove fill or stroke
- Shift + / to remove the stroke
- Option + / (Windows: ALT + /) to remove fill
Use paint bucket

Press B at any point while editing a shape to fill it with a color. You can also use I to grab a color with the eye dropper.
Remove lines between anchor points
To remove the lines between anchor points, simply select the line you want to remove and click Delete (Windows: Backspace).
Source: Medium, UX Collective